Toddlerhood is exploration and curiosity, culminating together in an explosion of creativity. Early toddlerhood (ages 1-2) is an especially exciting time, full of fun activities to try.
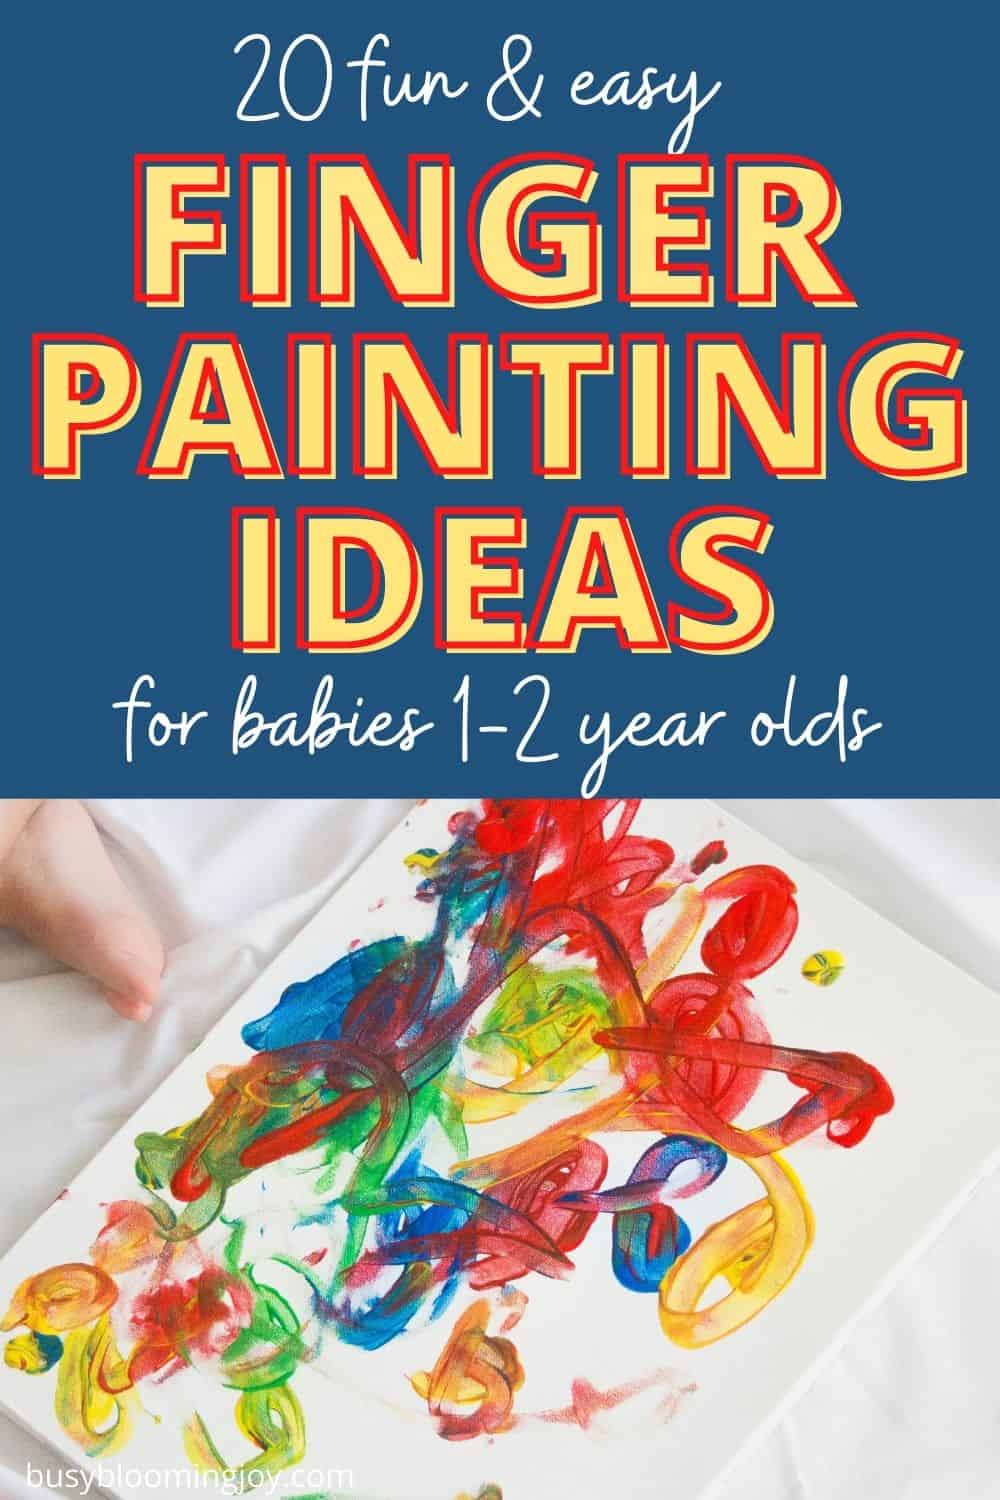
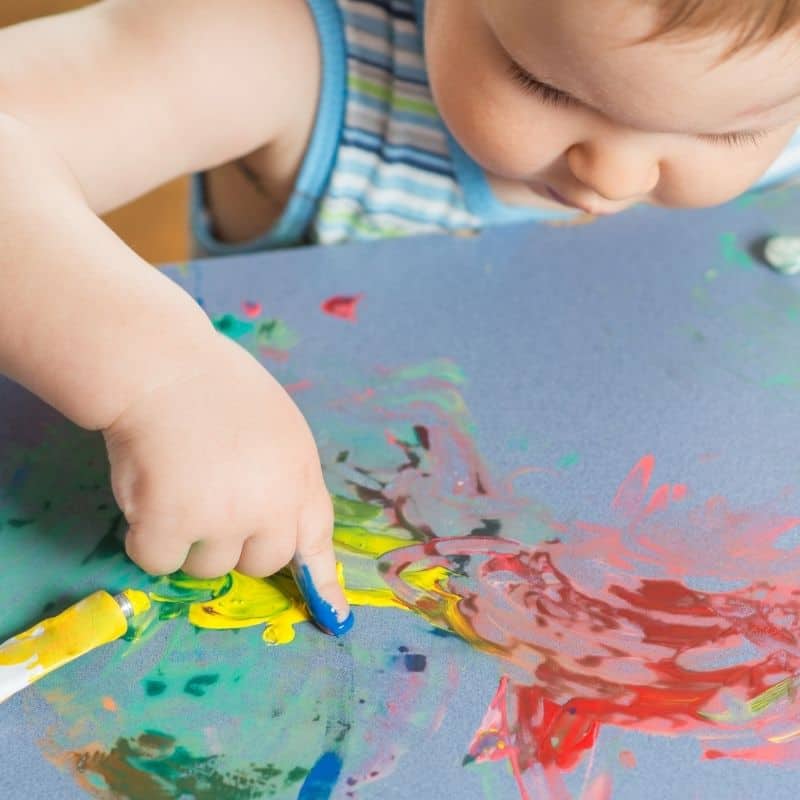
One of the most exciting, easy, and open-ended art activities you can facilitate for your 1 or 2 year old is finger painting!
It’s fairly self-explanatory but there are many fun finger painting ideas for toddlers, outside of simply putting little paint-covered fingers to paper.
This blog will detail the developmental significance behind finger painting for toddlers. Then provide finger painting ideas for 1 and 2 year olds, including finger painting for babies.
It is our hope that these resources equip you to provide simple finger painting activities for your baby or young toddler.
This post contains affiliate links. If you click on one and make a purchase, I may receive a commission at no extra cost to you.
How finger painting supports the development of 1 & 2 year olds
Finger painting is a multidimensional activity when it comes to infant/toddler development. It works on so many aspects of child development at the same time, which makes it not only fun, but productive too!
Through finger painting, your toddler’s sensory expression and desires are satisfied.
Sensory play is vital to young children, as it is a catalyst for exploration of their senses, new concepts, and the world around them. Sensory activities are a major component of play-based learning, which is the most effective way for children to learn.
Process art vs. product-based art
With any art activity, the results of the project are beautiful and exciting to look at. But the creation process is even more important for young children than the results.
- Process-based art places significance on the experience of creating the artwork
- Product-based art focusses more on the outcome, with less value on the experience of creation
Process-based art is more open-ended, while product-based art has more specificities.
Process art empowers children to lean into their newfound independence and curiosity.
Product art creates a keepsake-style result that will be treasured for years to come.
Both process and product-based art can be achieved via finger painting, even during the same project.
Other benefits of finger painting
Finger painting (and most arts and crafts) will assist in developing your toddler’s:
- Emotional regulation skills – staying patient in order to achieve their desired result.
- Self-regulation and problem-solving – if they feel frustrated while making mistakes as they create
- Throughout the process, they begin to establish and build confidence
- Fine and gross motor skills are strengthened through the art of finger painting
Finger painting also further develops a child’s hand-eye coordination, and strengthens their ability to visualize, inquire, and plan.
What age can a baby begin finger painting?
A baby can experiment with finger painting at virtually any age. Finger painting is an excellent tummy time activity for younger infants, especially a no-mess finger painting option.
However, it’s best to start at six months old or later.
By this point, baby will be able to hold their head up, and likely to be sitting up too. This will help support their body during the activity.
They’ll also have a longer attention span and increased curiosity by six months which continues to grow as they age. By age one and into toddlerhood, their curiosity is booming!
Offering your baby the opportunity to finger paint will be the perfect outlet to channel this newfound thirst for knowledge and discovery.
What paint is safe to use on babies and toddlers hands?
You will want to use non-toxic paint when facilitating a finger painting with your toddler.
This Crayola Washable Tempera Project Paint is water-based, washable and non-toxic. You can also try these Veggie Baby Fingers Paints, not surprisingly, made from vegetables!
How do you make edible finger paint for babies?
Food based paint is one of the safest finger paints for babies because, when they inevitably put their paint-covered fingers in their mouth, you don’t have to worry for their safety.
Luckily, making food-based paint is easier than you think!
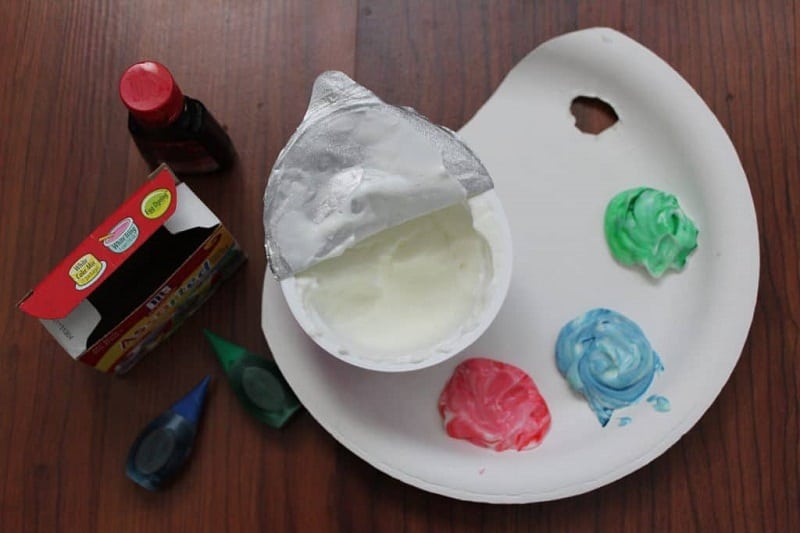
Yogurt paint
You can create homemade, edible finger paint for babies using yogurt and a few drops of food coloring. The Salty Mamas edible yogurt paint recipe is a great resource for making your own yogurt paint.
Pudding cup finger paint
This is made similarly to yogurt paint: get light colored pudding cups and put drops of food dye in each cup (one color per pudding cup.) Now, you have easy edible finger paint for toddlers.
Fruit & veg compote paint
You can also make a homemade fruit or vegetable compote or purée to utilize as finger paint. Use raspberries, blueberries, beets, or any fruit that doesn’t turn brown quickly.
- Briefly heat the fruit on the stovetop
- Add a little bit of honey for consistency and a little sweetness when your 1 or 2 year old puts their fingers in their mouth
- Once the fruit has simmered and reduced, take it off the stove top to cool
- Once it cools, you’re ready to start finger painting with your toddler!
Entertain Your Toddler has a great post on making and using fruit purées as finger paint.

Homemade cornstarch finger paint for toddlers
Another option is to make a homemade non-toxic finger paint for toddlers. It’s not designed to be edible like the ones above, but it won’t matter if your baby or young toddler gets a few fingerfuls in their mouth.
Cornstarch finger paint recipe
- In a saucepan, mix a tablespoon of cornstarch with the same quantity of cold water
- Add a cup of boiling water and stir until thick. You may need to place over a medium heat to help with the thickening.
- Once thickened, add your food coloring of choice.
Here are some detailed recommendations for baby safe finger paints.
Do you need special paper for finger painting?
You don’t need special paper for finger painting. Any type of paper will work but it does depend on the final result you’re looking to achieve.
If you want to keep the end result, heavier papers, like freezer paper, cardstock, or durable construction paper will be better as they’re less likely to tear from wet paint. You can also use watercolor paper, which is sturdier than normal printer paper.
You can also buy paper pads specifically designed for finger painting, such as:
For larger finger painting projects, try kraft paper that comes in big rolls:
They’re thinner than cardstock and freezer paper, but the larger size is great for finger painting.

Free-for-all Finger & Hand Painting Ideas For Toddlers
This “free-for-all” finger painting style is simple and so enjoyable for both of you. No micro-managing allowed!
All you need is paint, paper and your toddler’s fingers and hands for these simple finger painting ideas.
Inevitably this type of finger painting for toddlers is the messiest. Check out the tips that follow the ideas for some help in this department!
1. Large sheet of paper, scattered with blobs of paint
- Set out large sheets of paper on the floor
- Put your 1-2 year old on top
- Drop random blobs of finger paint all over the paper and let them explore
Alternatively, you can lay the paper out across a large table and sit your baby or young toddler in front of it and let them do their thing.
2. Sheet of paper entirely covered with one or two colors
Cover the entire sheet of paper with a color or two bright colors that mix well. Let your baby scribble and smudge the paint with their fingers and hands
Using primary colors provides you with an opportunity to introduce color theory to your 1 year old and experiment with color mixing.
3. Paper and paint separate
Pour one or two different color paints onto paper plates or another sheet of paper, one color per plate/sheet. Set these beside your finger painting paper.
Then, encourage your 1 or 2 year old to transfer paint to paper using their fingers and hands. Demonstrate it first and your toddler will quickly get the idea.
Other Process Art Based Hand & Finger Painting Ideas for 1 & 2Year Olds
Here are some more finger painting ideas for toddlers that focusses entirely on the process of creation.
4. Finger paint in the bathtub
You can use regular finger paint (homemade or store bought) and just wash it off at the conclusion of bath time.
Or you can purchase special bathtub finger paint soap. (This makes a great stocking stuffer or gift for young child’s birthday.)
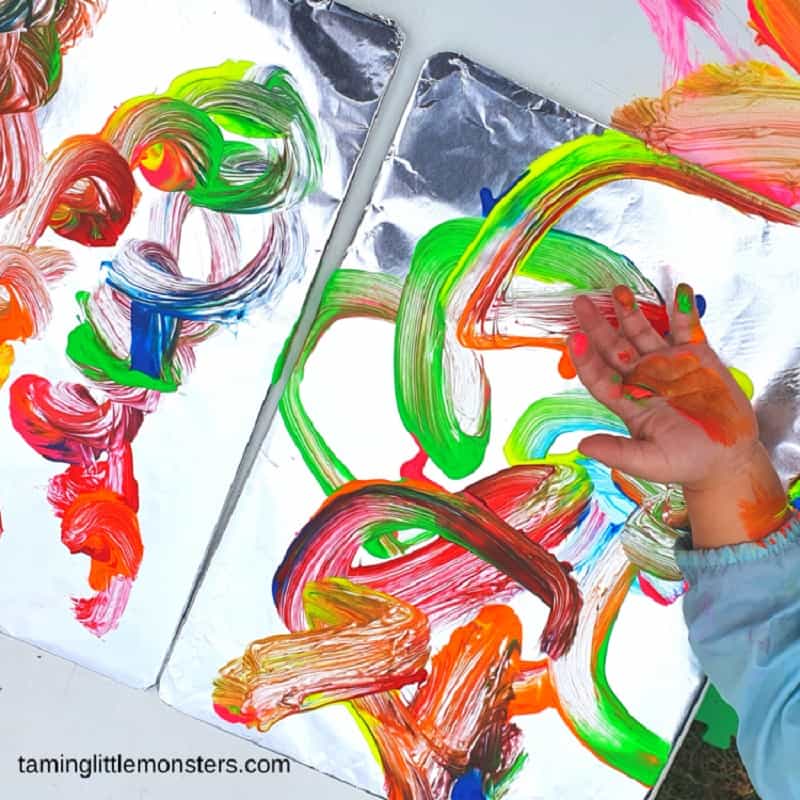
5. Finger paint on wax paper or aluminum foil
This allows your young toddler a different texture to explore and finger paint on.
If you wish, you can then attempt to create a keepsake once your child has finished painting their masterpiece.
Simply press the wax paper/foil, paint side down, on a piece of construction paper. Carefully peel it off to reveal the final image on the construction paper.
Taming Little Monsters has an excellent post on foil painting for your reference.
6. Finger paint with paint inside a resealable plastic bag
For a mess-free finger painting alternative, paint inside a resealable plastic bag or Ziploc bag.
This is a great option, especially for younger infants during tummy time. But it’s also great for 1 and 2 year olds for the days you don’t have the time or energy for a laborious clean up but want to offer a creative and engaging activity.
Try these simple at home toddler activities for more engaging mess-free ideas.
7. Finger paint with water on different colors of construction paper
Finger painting for toddlers doesn’t even have to involve paint! Use water on construction paper instead. The water will disappear as it dries which normally intrigues young toddlers.
This is such an easy and fun finger painting idea for 1 and 2 year olds who like to continuously paint.
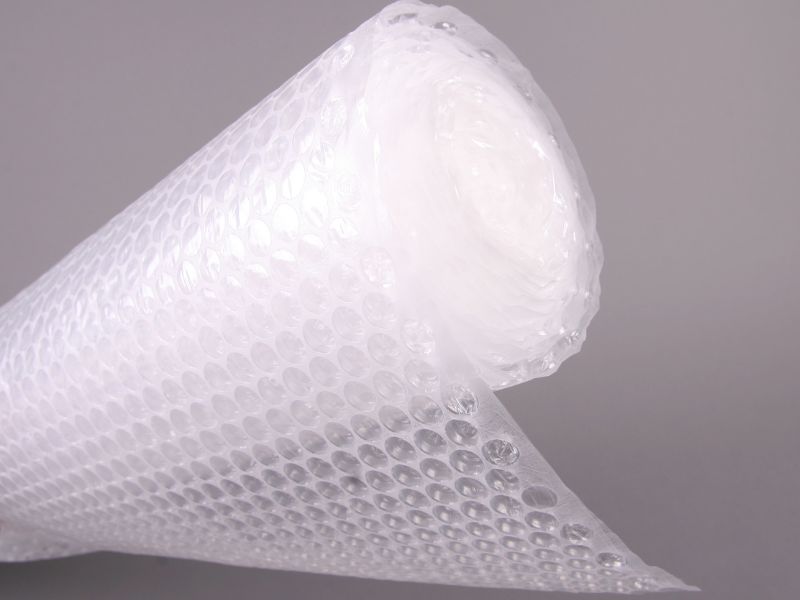
8. Utilize bubble wrap
Bubble wrap will add texture to your toddler’s finger painting process, which heightens sensory exploration. Have them finger paint directly onto the bubble wrap. Or try honeycomb paper, another exciting new texture for them to explore.
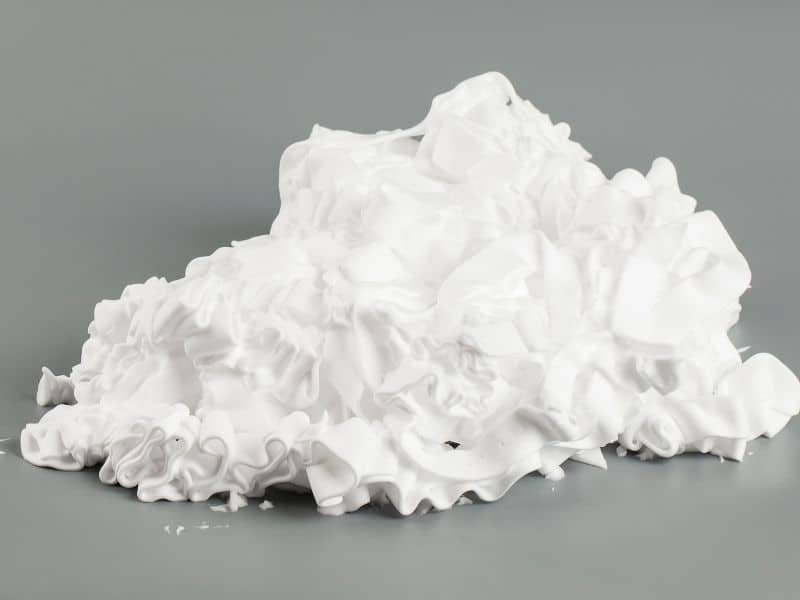
9. Finger & hand paint with shaving cream
Here’s another simple finger painting idea for toddlers that doesn’t use finger paint. Scribbling and making smudgy hand prints in shaving cream provides an interesting sensory experience that’s great for fine motor skill development.
Simply spray shaving cream on the table or surface you’re using, and encourage your 1 or 2 year old to paint images in the shaving cream.
Finger painting wtih shaving cream is a bit like a messy, sensory version of an Etcha Sketch! You can swipe over the cream to create a new blank canvas for your toddler to draw on again.
Add dye or food coloring to the shaving cream for an additional sensory element if you like.
If you’ve added color, you can also attempt to save their artwork by transferring the shaving cream painting to paper. Gently lay paper on top of the shaving cream, lift it up and scrap the cream off.
Painting with shaving cream is a fun sensory activity and also an exciting way to work on early-literacy. When your toddler starts on letter recogntion and phonics you can encourage them to write letters in the shaving cream.
For more fine motor fun of the less messy type, try this DIY toddler twist-top board.
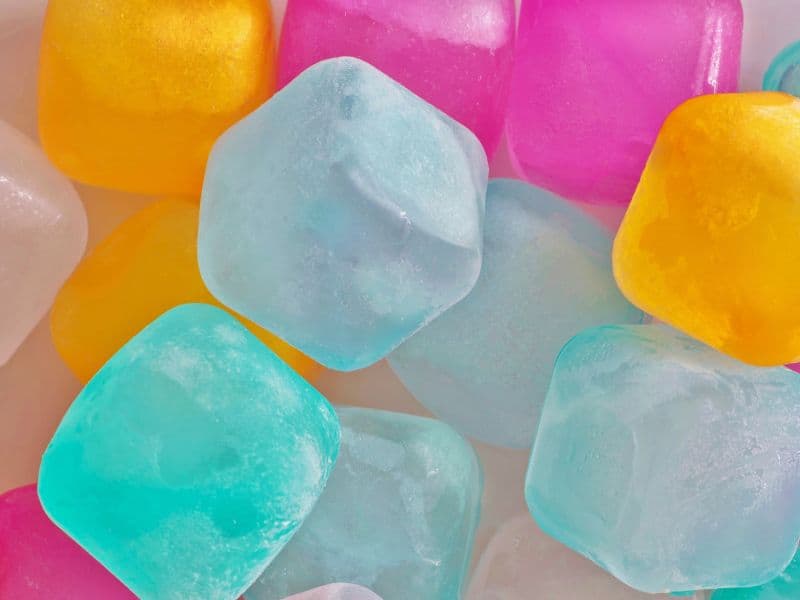
10. Use frozen finger paint
Freeze the finger paint for your baby or toddler in an ice tray for a new sensory activity.
This is a fun play idea for outside when it’s hot. They can paint, explore and use their imagination with the frozen paint cubes while cooling off.
11. Use a stamp pad
In lieu of typical finger paint, use a toddler-friendly stamp pad for a fast-drying art activity. This normally involves a little less clean up than other finger paint ideas for toddlers.
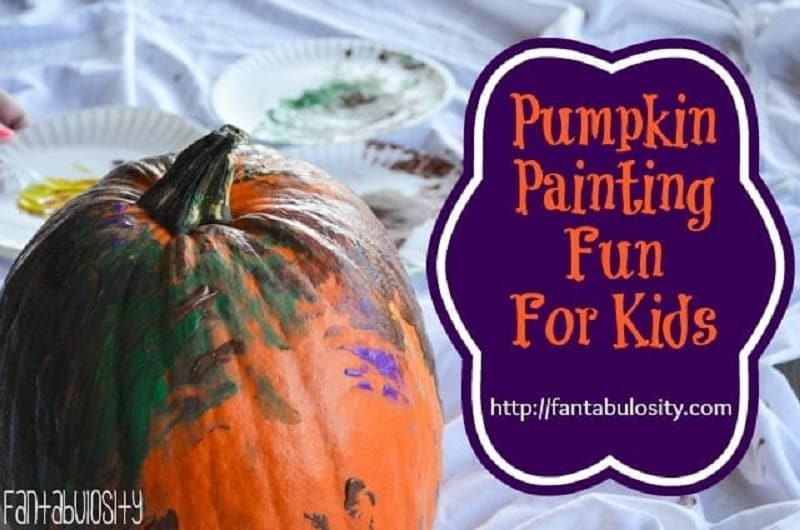
12. Paint on a pumpkin or any object
Changing the foundation your 1 or 2 year old is painting on provides an exciting new experience. It’s a simple way to create different finger painting ideas for toddlers.
Finger or hand painting a pumpkin makes for a fun Fall activity for toddlers and babies.
13. Use watercolors as finger paint
Have your 1 year old dip their fingers in water, then on the watercolor palette into the color of their choice, and then onto paper.
Another finger painting idea for toddlers that’s a little less messy than others!

14. Finger paint on surfaces outdoors
Save the stress of mess indoors and try this outdoor finger painting idea for toddlers.
Try the side of the house, garage, window, etc. A quick hose down and your toddler can to start over so they can do it again and again.
15. Add different materials to the paint
To change up the texture and heighten the sensory experience, try adding different materials to the finger paint.
Add coarse salt to the paint to make it bumpy, add sugar so it’s gritty, add water to the paint so it’s smoother and thinner.
This is a simple way to exploring different textures, essential at this age.
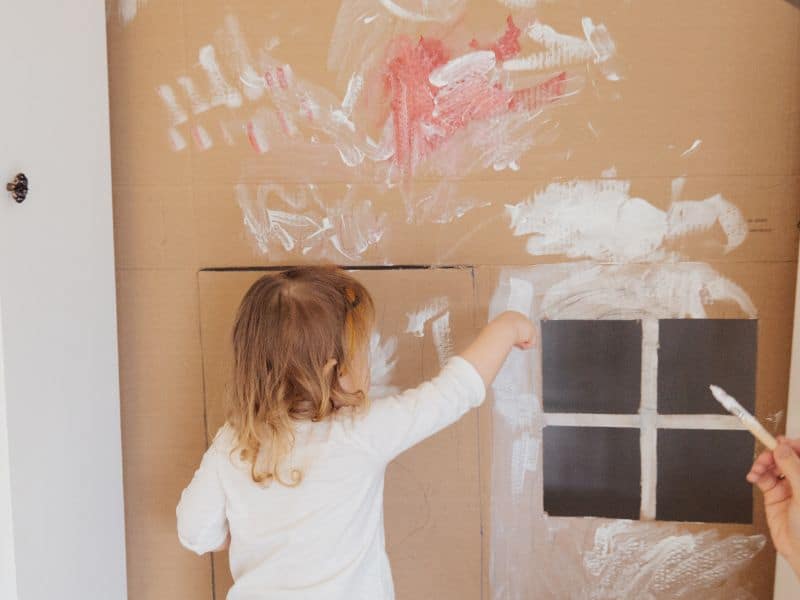
16. Finger paint a cardboard box
Finger painting for toddlers that combines another favorite of little people: a cardboard box! If it’s big enough, you can sit your baby or toddler inside it, what better way to contain the mess?
Love doing sensory activities with your young toddler?
Try these themed sensory posts:
- 21 Fun & Easy Dinosaur Sensory Activities For Toddlers
- 25 Easy FAKE SNOW Sensory Play Activities
- 50 Christmas Sensory Activities & Bins for Toddlers
- 25 Fun fall Arts, Crafts & Sensory Activities for Infants
- 25 Simple Messy Play Ideas for 1 and 2 Year Olds
Finger Painting Ideas For 1-2 Year Olds That’ll Make Great Keepsakes
Finger painting for toddlers and babies is about offering the opportunity to explore and create (process-based art) however they please. This often means there’s not much worth keeping!
However these finger painting ideas are such that the end result will hopefully make a great keepsake for years to come. Or at least worthy of a place on the fridge!
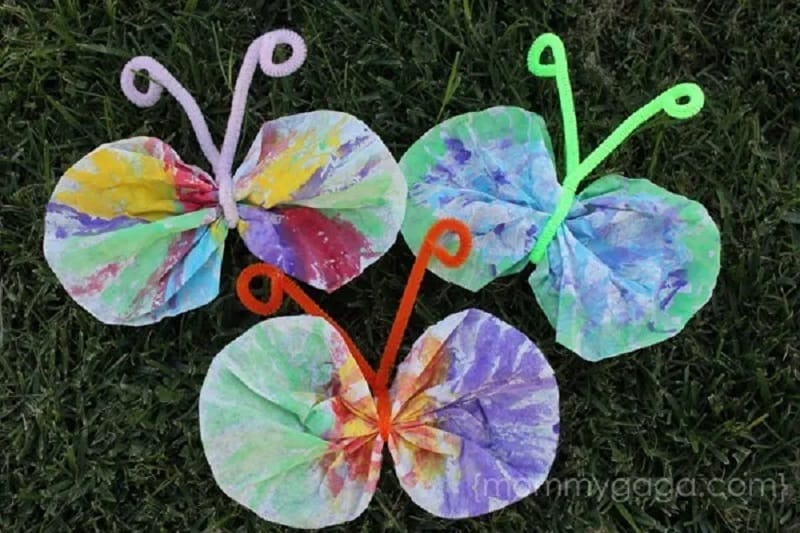
17. Finger paint on a coffee filter
Allow your baby or toddler to finger paint as they please onto a coffee filter. Once dry, you take over to turn the mini masterpieces into butterflies.
Pinch the coffee filter in the middle, fasten a pipe cleaner around the middle, and leave a little extra pipe cleaner sticking up on top to create antennas.
They’ll look really pretty hung on a window, with the sunlight peaking through and illuminating them.
Check the tutorial from Honey and Limefor more details.

18. Make handprint chicken art
Here’s a fun hand painting idea for toddlers, where you need to encourage the hand painting!
This project is super cute and would be an adorable keepsake. It’s great for when you’re teaching your child about farm animals but can work any time of year.
You may need a few attempts to get a decent print, but then allow your toddler plenty of opportunity to squish, squash and smear their own paper with handprint art.
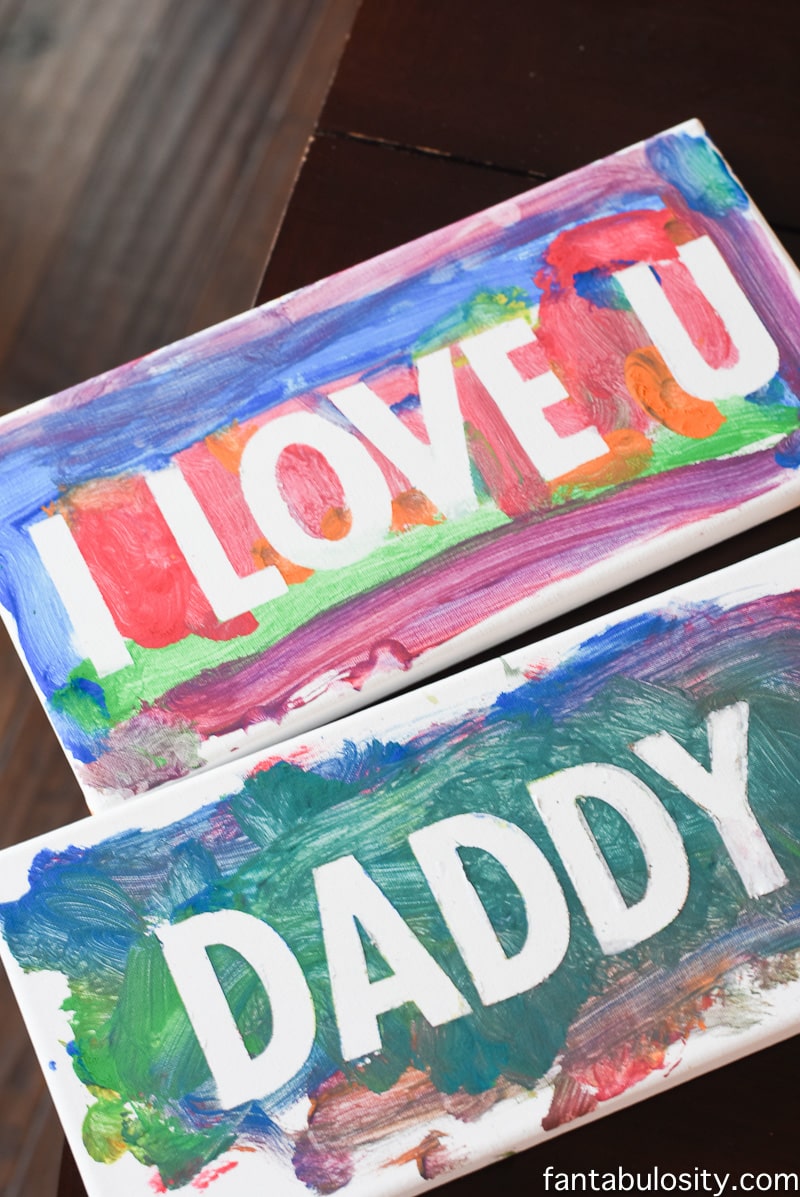
19. Try a resist art finger painting technique
Resist art is when you create a negative space (whether with crayon or paper cutouts) and then paint over it. This is an easy way to create cute keepsakes.
The project outcome results in a silhouetted design the color of the paper, with a finger painted background.
Allow your toddler to scribble white crayon on the paper first or use painters tape to write simple words, as above. Then your baby or toddler can get to work finger painting over it.
Fantabulosity has a cute “I Love You Daddy” paint resist art activity. This will be make a perfect Fathers Day craft and gift.
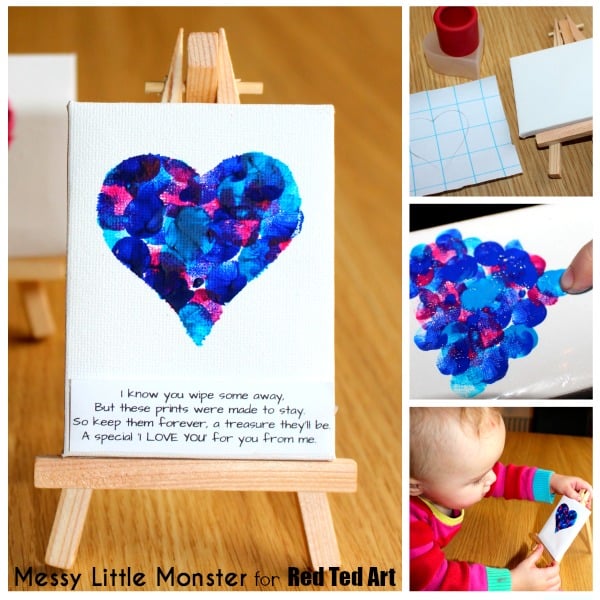
20. Create a fingerprint heart and poem
Here’s more finger painting for toddlers that allows free reign of the creative process while also resulting in something well worth keeping, a little like the resist art. Here you use contact paper to create a heart-shaped frame, in which your 1 or 2 year old can cover in their finger and hand prints.
Check the instructions and download the free template from Messy Little Monster .
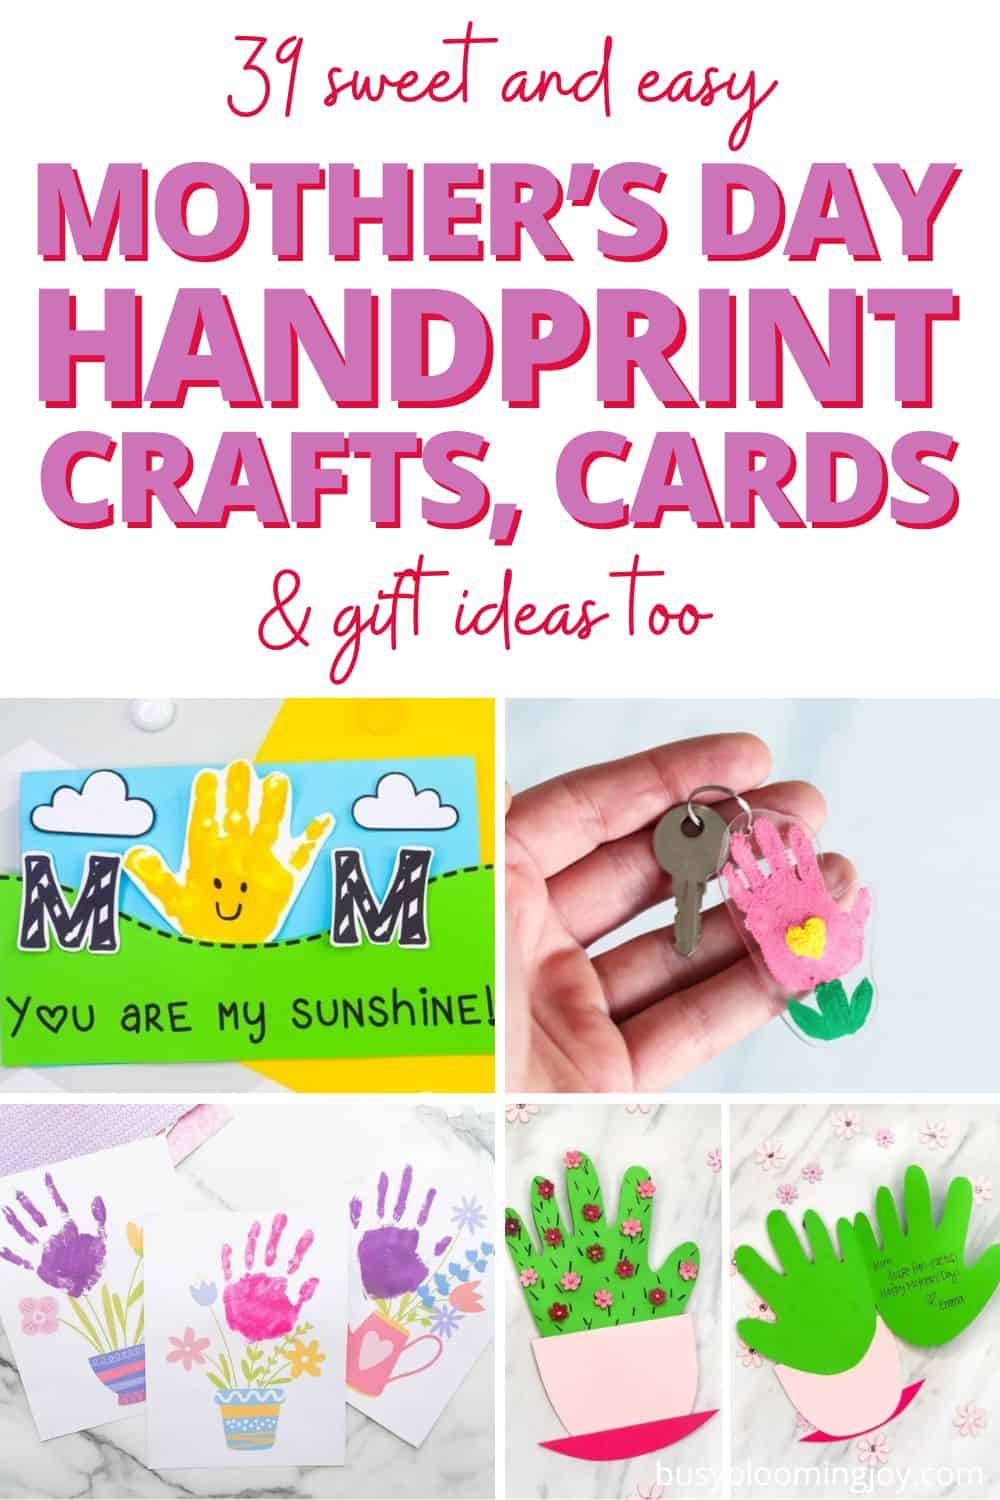
The finished finger painted canvas will make a lovely gift for Mothers Day or for another special person. It’s sure to be treasured for years to come.
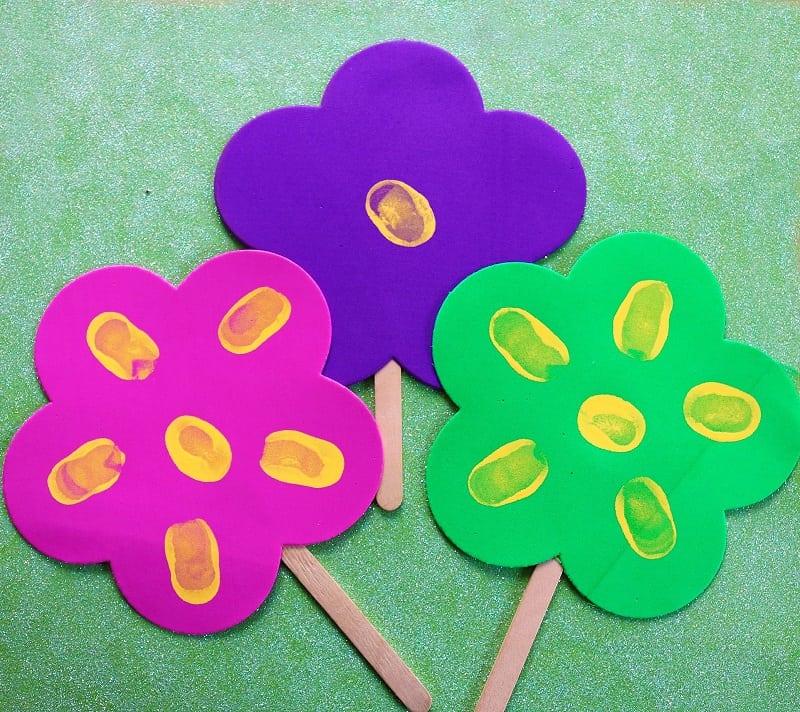
21. Thumbprint popsicle stick flowers
Here’s some simple finger painting for babies and toddlers from In the Playroom that will make a cute keepsake and a lovely craft for Spring.
A colorful thumbprint flower will would make for a thoughtful and special gift, and would also be fun to create together.
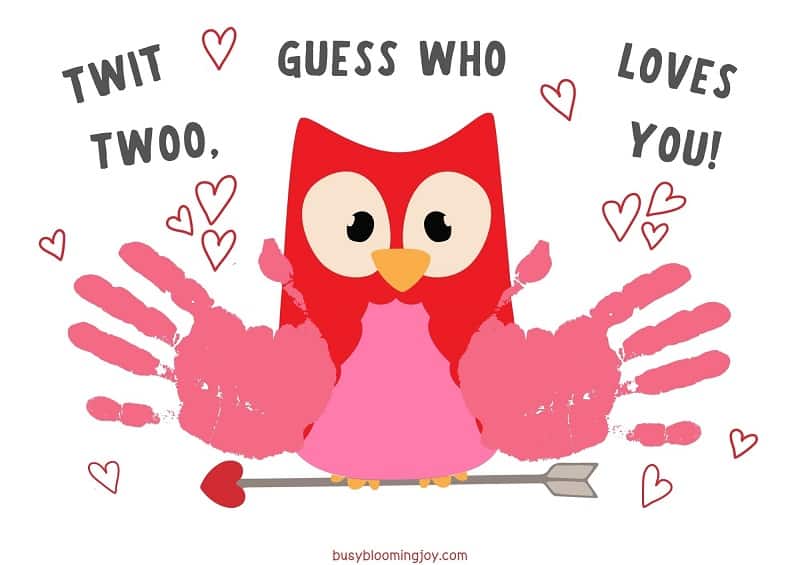
22. Valentine’s handprint art
Another template for some cute handprint art. There are a few different ones to choose from in our free Valentines handprint template bundle – click the link to choose your favorite. Mine is the Twit-Twoo owl, pictured. Isn’t it adorable?
For more cute handprint art, check out these handprint birthday card ideas.
Bookmark these cute seasonal crafts for later
These are mostly product-based crafts, but there’s still plenty of room to be creative. And crafting is a lovely way to spend time with your young toddler.
- 50 Easy Easter Bunny Arts & Crafts Ideas For Toddlers
- 37 Not-so-spooky Halloween Crafts & Activities for Toddlers
- 47 Cute Easy Christmas ornaments To Make With Toddlers
- 41 Easy Santa Claus crafts for toddlers
10 Tips for Finger Painting with Babies & Toddlers
Fingerpainting for toddlers and babies can get really messy. Which may put you off getting started.
Here are some tips that should help you with the finger painting ideas for 1 and 2 year olds listed that should help minimize some of the clean up.
1. Protect a large area!
Use an old table cloth to protect your table or, if you set everything up on the floor, a shower curtain can work really well.
2. Have a buffer zone
Create a protective space just outside of the painting space in case the mess doesn’t stay fully contained in just the painting space.
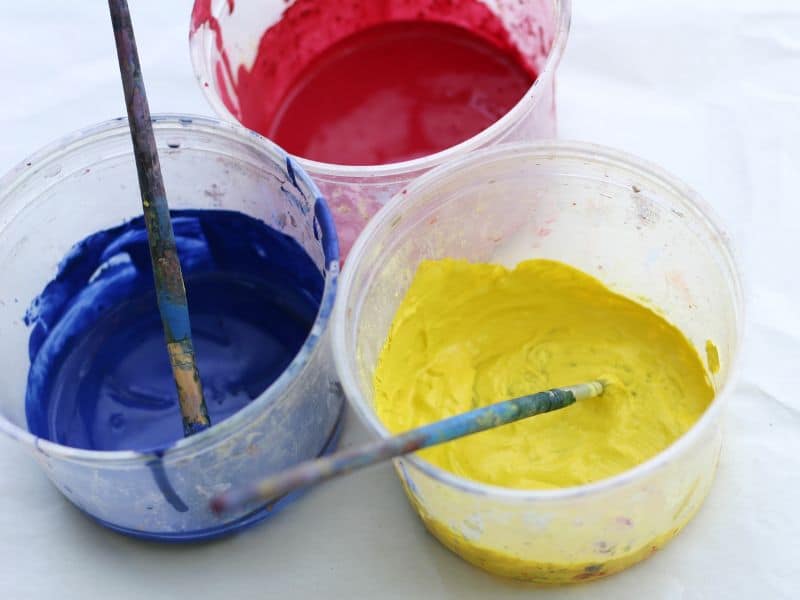
3. Use 2-3 colors that mix nicely together, or use primary colors (red, yellow, blue.)
Limiting the colors of finger paint is less overwhelming for a toddler, and may extend their attention span since they can focus better with fewer options.
Using a couple of colors or just primary colors will develop their understanding of color theory, which focuses on the process of color mixing.
An engaging book to include in this activity to expand your child’s understanding of color theory is Mix It Up by Herve Tullet.
4. Be firm yet gentle in setting boundaries
Children need structure and boundaries in order to feel secure and to better understand expectations. Make sure they know what boundaries they must follow, but in a gentle way that still makes them feel safe.
It’s definitely possible to be firm and kind simultaneously.
5. Secure the edges of the paper to the surface with tape to keep it from sliding around as they work
There’s nothing more frustrating than the paper moving around while you’re trying to create beautiful artwork!
Masking or painters tape is great for this, because it comes off of paper smoother than regular tape, and is less likely to cause tears or small rips.
6. Encourage your toddler if they’re hesitant to explore a new texture
They may be apprehensive at first because of the way the paint feels (wet, cold, slimy.)
Encourage them by demonstrating finger painting yourself. If they see you do it, they may be more keen on trying themselves.
You could also help them apply the paint to their finger a little bit at a time by guiding their hand to the paint and onto the paper.
7. Remind your baby, “Out of your mouth”
1 and 2 year olds (and older toddlers) love to explore the world via their mouth. This is why it’s so important to make sure the paint is non-toxic and safe.
Despite your reminders, they may still put their paint-covered fingers in their mouth, but the more you say it and the more you “practice” it, they’ll eventually get the hang of it after several painting sessions.

8. Dress your baby or toddler appropriately
Put a painting smock, bib, or old shirt on your baby or toddler before beginning the activity so they don’t get paint on their clothes.
Depending on the setting and circumstances, you can even allow them to paint unclothed with just a diaper on. This allows them to move freely as they explore!
You could also put a swimsuit on them and paint outside on a nice day. This makes it easy to hose them off at the end.
Alternatively, dress your baby or toddler in black or dark clothes for finger painting, so the paint stains won’t show.
9. Try to keep everything contained to one area so all materials are easy to reach for/access
Keep wipes, towels, and/or cleaning materials close by for quick and easy clean up.
My favorite is to have a bowl or bucket of warm soapy water at the ready – not too close in case it gets spilt!
Utilize a tray of some kind to place the paper on, keeping the mess contained. This way, you won’t have to worry as much about covering your table perfectly.
10. Be prepared for your baby or toddler to want to paint multiple pieces of artwork, not just one
Once their curiosity overtakes them, your 1 or 2 year old may want to continue finger painting for longer than you thought. Try to allocate plenty of time and space for them to explore in an open-ended way without feeling rushed.
Are you ready to start finger painting with your 1 or 2 year old?
Finger painting with babies and toddlers provides so many enriching opportunities. Hopefully now you’ll have plenty of fresh new finger painting ideas to offer your 1 – 2 year old.
Your key role in finger painting activities and art projects is simply as the facilitator. Provide them the tools, resources, and space to create, and let your little artist run with it!
It’s lots of fun to watch your child follow the lead of their own interests. It can help you understand them better, and watching their individuality blossom is always an exciting thing to witness.
We hope this list of tips and finger painting ideas for 1-2 year olds is a helpful resource to equip and empower you. Lean into it, and have some fun together!
____________________________________
Looking for more simple ways to encourage healthy development in your toddler?
Try these:
- 50+ Indoor Gross Motor Activities for 1, 2 & 3 Year Olds
- 39 Simple & Sanity-saving Toddler Activities
- 39 Fun & Easy Art Projects & Crafts for 1 & 2 year olds
- 50 Best activities for 18 month old toddlers at home