Looking for a not-too-spooky witch craft that’s offers creativity and the opportunity to build fine motor skills?
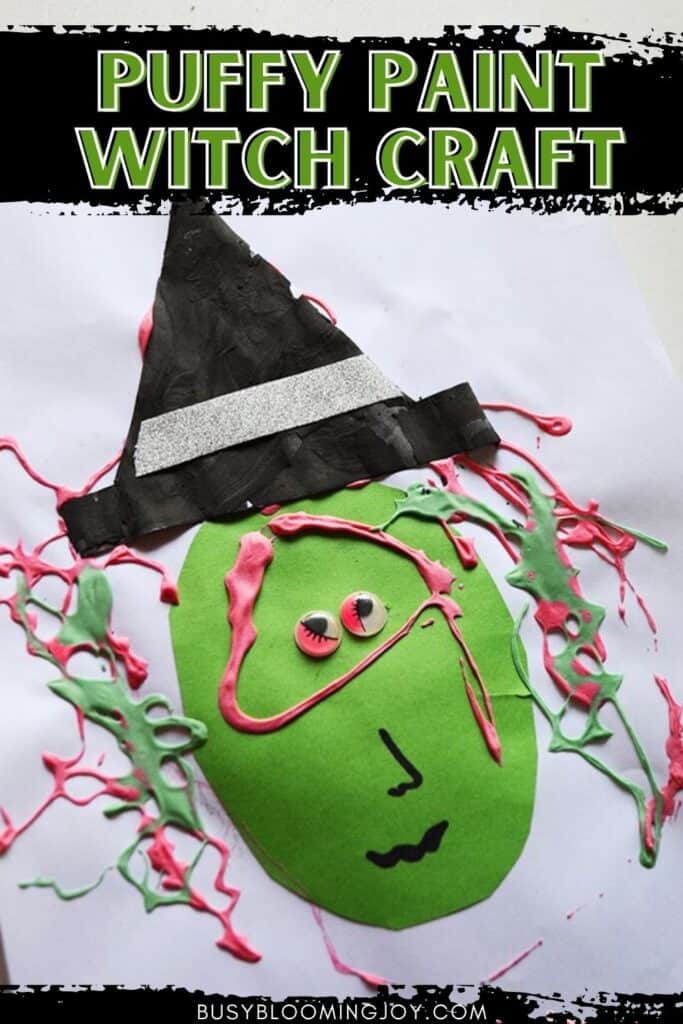
This adorable Halloween activity lets kids create their very own witch using just construction paper, washi tape, and a few simple craft supplies.
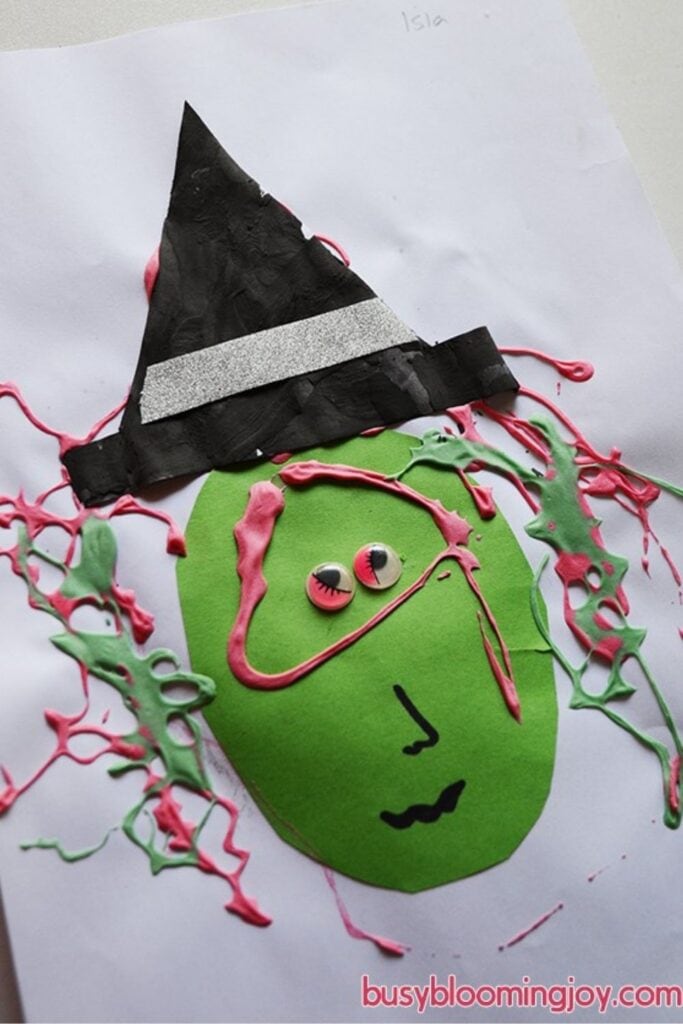
With a sparkly washi tape hat band, silly googly eyes, and a hand drawn grin, your witch is already full of character—but the real magic happens with her homemade puffy pink hair!
Using a quick DIY puffy paint recipe, kids can give their witch the wildest hair in the cauldron!
This Halloween craft for kids is an easy and creative hands-on activity perfect for a creepy crafternoon at home or in the classroom!
What will your preschooler learn?
This craft needs a little creativity and quite a lot of fine motor control:
- cutting out the witches face and hat
- sticking on the washi tape hat band and googley eyes
- painting the witches hair with puffy paint
The latter may need a little assistance, to control the flow and direction of the puffy paint.
Supplies needed
To make the pink puffy paint (alternatively buy from the shops):
- glue
- shaving cream
- flour
- pink food coloring
- Sandwich bag or ziplock
Other supplies:
- White paper or card
- Black construction paper
- Green construction paper
- Sharpie
- Googley eyes
- Washi tape
- Glue stick
Making The Witch
- Cut and stick an oval shape out of the green construction paper and stick onto the white card.
- Cut a hat shape out of the black paper and stick on top of the witches head.
- Add sparkly washi tape hat band.
- Stick on googley eyes.
- Draw on witches mouth and any other features.
Now it’s time to make and apply the puffy paint hair!
Making The Puffy Paint (& Recipe)
1. Make puffy paint:
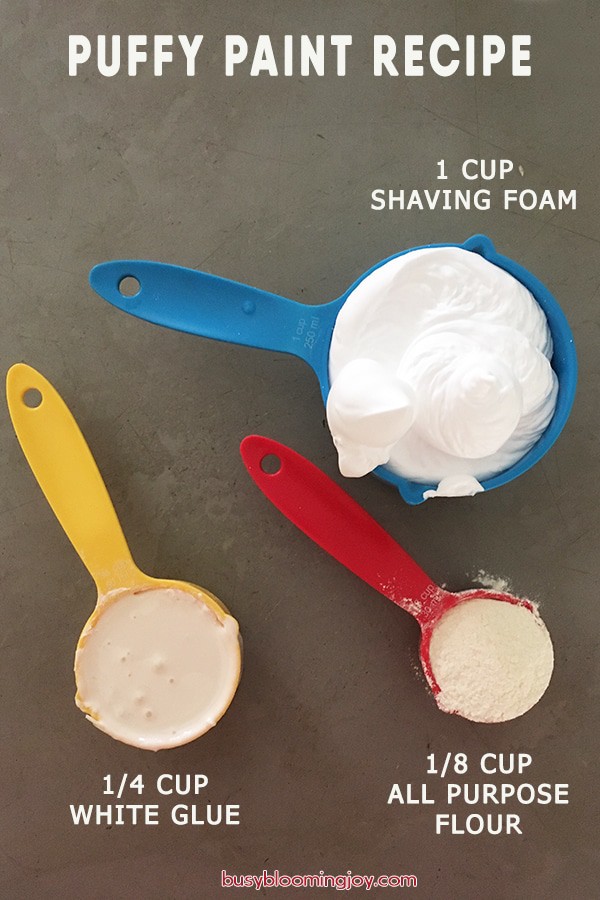
After a little experimentation via other recipes I found online, this is the puffy paint recipe I used this:
- 1 cup shaving foam
- 1/3 cup white glue
- 1/4 cup flour
- a few drops of black food coloring
NB: different brands of glue and shaving foam plus different climates will impact the thickness of the puffy paint.
If the recipe seems too stiff:
Add more glue and shaving foam until the consistency slowly drips off the spoon or fork or whatever you’re mixing with.
Let it drip onto some paper and test how easy it is to make shapes with.
If the recipe seems too runny:
You guessed it, add more flour. Then test as before.
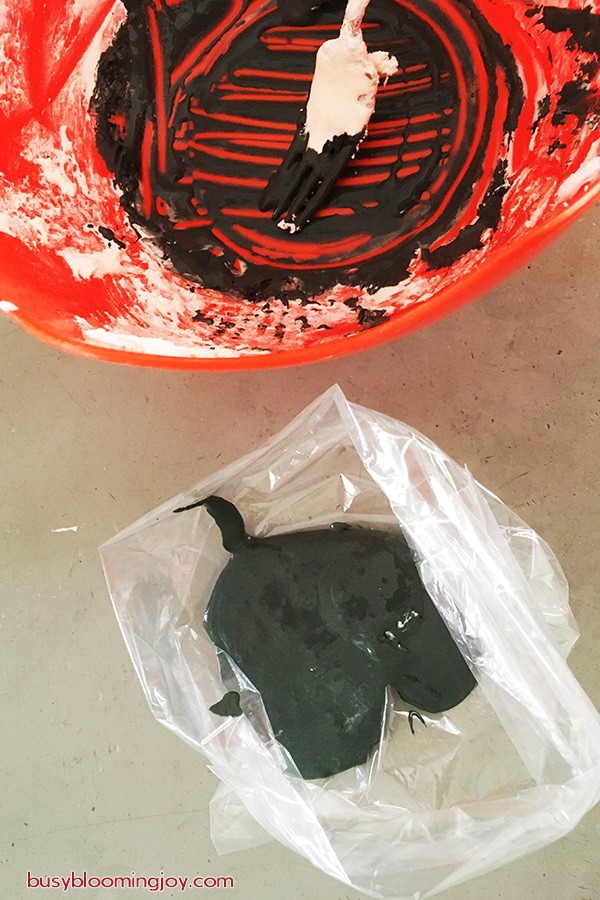
2. Spoon puffy paint into a bag
Think of this puffy paint activity like icing a cake. So you need to get that puffy paint into it’s piping bag.
I used a sandwich bag at first. Not ideal as it was a bit thin and started to stretch with too much squeezing.
You need a slightly thicker bag, like a ziplock bag.
Tips for getting the darn paint into the darn bag
Can you tell I found this a little tricky?!
I found the best way was to roll down the sides of the bag and put it flat onto the table. Then try and spoon it in straight into the middle of the bag.
If you get the paint on the sides, it becomes a giant sticky mess.
3. Tie up the bag with a knot at the end
If you were doing this kid-free then the knot is not necessary. But since your preschooler is likely to start squeezing the puffy paint when holding the paint bag right in the middle, the paint is going to get squeezed out the top.
DON’T CUT THE HOLE UNTIL YOU’RE ABSOLUTELY READY TO START!
This is step no. 5 but just putting this here to make sure you don’t do this too early! Because as soon as you snip that hole the paint is going to start oozing out so you need to be ready.
4. Cut a tiny hole in the end of your paint bag
Like really, really small.
If you cut it too big, there’s no turning back. You’ll have to start all over again.
If it’s too small you can easily make it bigger…
4. And paint!
This is quite tricky so little ones may need a little help.
It really takes a lot of control and coordination to both squeeze the paint to get a good flow and trace the lines. So it really is a great exercise for this type of fine motor skill.
___________________________________
Looking for more no-so-scary crafts for your toddler or preschooler this Halloween? Check out:
We have plenty more creative insp for the spooky season here: